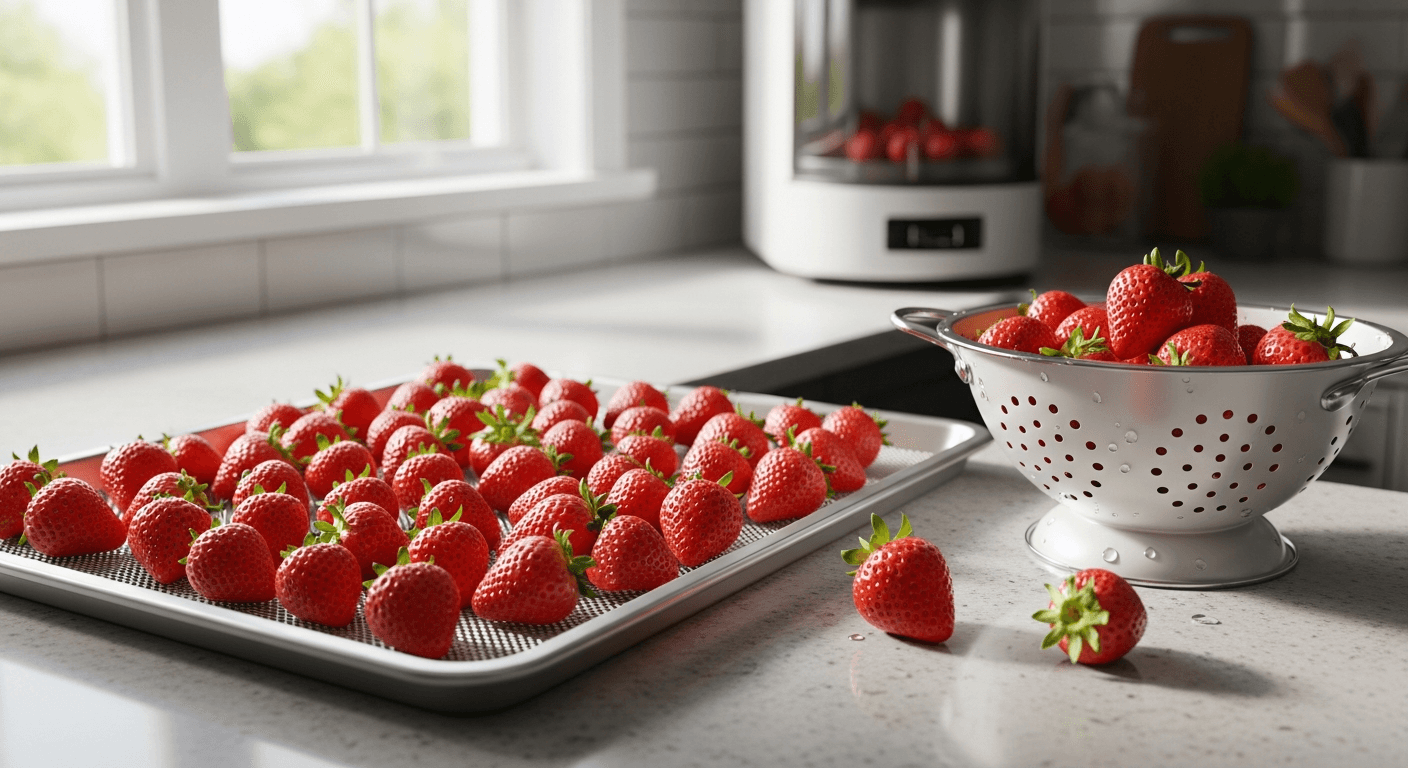

DIY Guide: How to Dry Freeze Strawberries at Home
Introduction
Do you think about a ripe and sweet strawberry and feel hungry? It is easy to keep that fresh taste of summer with a freeze dryer right at home. A home freeze dryer helps you keep your strawberries' flavor and the nutrition inside them. This simple guide is here to help you with every step. You will learn how to get your berries ready, use your dryer, and keep your strawberries in storage the best way. This way, your favorite fruit can stay good and tasty for years as a crunchy snack. You will keep the great taste, feel, and nutrition for a long shelf life.
Understanding Freeze Drying and Its Benefits

Freeze drying is a new way to keep food fresh. It is different from canning and drying. The drying process helps to save the food's nutrition, sweetness, and shape. When you freeze dry strawberries, you get their real taste and big flavor. It is like you picked them right now.
The best thing about freeze drying is that it gives your food a really long shelf life. This is great if you want to keep your food for a long time. Freeze drying takes out almost all the moisture, so the food does not go bad. You do not need to use any additives. Let's see what freeze drying is, and why many people feel it is a better way to keep your strawberries fresh.
What Is Freeze Drying?
So, what goes on in the freeze-drying process? This is a cool scientific way to take water out of food. There are three main steps. First, the food gets very cold inside a freeze dryer. The temperatures are really low---often between -30°F and -50°F. In this step, all the water in things like strawberries becomes hard ice because of the dryer.
Next, the dryer makes a strong vacuum around the frozen food. A gentle warming starts after this step. Because of the low pressure and some heat, the ice changes straight into vapor. It skips turning into a liquid. This thing is called sublimation.
Finally, the vapor gets pulled out of the chamber and then collected by a condenser. This step takes out about 99% of the moisture content in the strawberries. In the end, you get strawberries that are well-preserved, light in weight, and crunchy. These fruits keep their original feel and taste. This process works much better for long-term storage than using dry ice or ovens when it comes to removing moisture.
How Freeze Dried Strawberries Differ from Dehydrated Strawberries
You may want to know how freeze-dried strawberries compare to dehydrated strawberries. Both ways help keep strawberries, but they give very different results. Dehydrated strawberries use heat to take out moisture. This step can change the taste, feel, and vitamins in the food. The fruit gets smaller and turns chewy or a bit rubbery.
The freeze-drying process uses cold and a vacuum to take water out. This stops time for the strawberries and keeps their fresh feel. The drying process helps the shape, smell, and taste stay strong. The berries do not get "cooked." At the end, you get light and crunchy strawberries. You can add water to make them feel and taste like new again.
Here's a quick comparison:
Feature Freeze-Dried Strawberries Dehydrated Strawberries Method Freezing and vacuum sublimation Low heat and air circulation Texture Light, airy, and crunchy Chewy, leathery, and dense Flavor Intense, fresh fruit flavor Cooked, concentrated flavor Appearance Retains original size and shape Shrunken and wrinkled Moisture Content ~1% removed ~20-30% removed Shelf Life 20-25+ years 1-2 years
Why Choose Freeze Dried Strawberries Over Other Methods?

When I tried my first freeze-dried strawberry, I was amazed. It tasted fresh and sweet, like it just came from the farm. This is the best way to keep strawberries from summer. You get to keep almost all the good nutrition in the fruit. Other ways, like canning or drying, can take away some of the vitamins with heat. With this method, you do not lose that sweetness or the healthy parts of the berries.
The long shelf life is a big plus. These freeze-dried strawberries can last for 25 years or even longer. This makes them a good choice for your emergency preparedness plans. You can have tasty fruit full of good stuff any time you want. You do not have to worry about it going bad. It is a good way to help you build a long-term food pantry.
In the end, nothing else gives you this kind of versatility. You can eat them as a crunchy snack. Or try adding water to use them in pies. You can even grind them into a powder for your smoothies. The drying process keeps them tasty and light. That is why they are great for snacks every day or taking with you for trips and backpacking meals.
Selecting and Preparing Strawberries for Freeze Drying
The quality of what you get at the end really comes from the fruit you pick. The taste of your freeze-dried strawberries will be the same as the taste of your fresh berries. If you start with berries that have no taste or are not ripe, your freeze dryer or dryer will not make them taste better.
So, picking the best strawberries and getting them ready is the first thing to do. You need to wash and hull the berries and choose if you want to slice them or not. Doing this right will help make sure the drying process is smooth. It also helps your berries taste good in the end. Now, let's talk about how you can get your berries ready.
Best Types of Strawberries for Freeze Drying
When you want to freeze dry, pick the best strawberries. The best ones are the berries that taste good when they are fresh. Start with sweet and ripe berries that smell nice. Some berries, like heirloom kinds such as 'Sparkle' or 'Mara des Bois', are good because they have strong sweetness. If you have your own plants, these types are great options because they taste good and are known for their sweetness.
If you are going to buy your strawberries, try and get them from a local farmer. Look for someone who cares more about the taste than how long the berries last during shipping or their shelf life. You can often find the best strawberries at farmers' markets. The main thing is to get berries that have that real peak-season flavor, so do not feel bad to taste one before you get a whole batch.
The rule is clear and easy to follow. If the strawberries taste good before you freeze-dry them, they will be even better as freeze-dried treats. The machine makes the flavors stronger, so it is important to start with high-quality, tasty berries. This is how you get the best results.
Washing, Hulling, and Slicing Tips
Getting ready the right way gives you the best results. To begin, wash your strawberries in cold water. This helps take off any dirt or leftovers from the surface. When you finish washing, dry the strawberries well with kitchen towels or paper towels. Make sure there is no water left on them. If there is water, the drying time will take longer.
Once your strawberries are clean and dry, you should remove the green top, which is called the hull. You can use a small knife or a special tool for this. After you remove the hull, you can choose how to cut them. It is best to slice the strawberry into even ¼-inch pieces so they dry well.
Here are a few key tips for preparation:
-
Wash the berries gently under cool, running water.
-
Pat the berries until they are completely dry. This will help speed up the drying time.
-
Use a sharp knife to remove the hull and cut a flat side on each berry. This will make slicing easier and more stable.
-
Try to slice every berry into uniform ¼-inch slices to get the most even results.
Should You Slice Strawberries Before Freeze Drying?
Yes, it is a good idea to slice your strawberries before you freeze dry them. When you cut the fruit into thin and even pieces, the drying time goes down by a lot. Thin slices help moisture get out faster and easier. This makes the whole thing work better. Try to cut them about ¼ inch thick.
You can freeze-dry whole strawberries, but it will take much more time. When an item is big and thick, it needs more time for all the moisture to come out from its center. If you slice the strawberries, you make more surface area so every part dries well and keeps the moisture out. This helps each part dry evenly and completely.
Put the slices in a single layer on your trays. This helps them dry better. The slices will not stick to each other. Air can move around each piece well. If you want good-looking fruit, fast dry times, and the best final result, take a few more minutes to slice your strawberries.
What You Need to Get Started with Home Freeze Drying
Getting started with freeze drying at home means you need some special equipment. But the steps are simple. It is not like canning, where you use many small things and steps. When you freeze dry, most of the work happens on its own after you set up the main machine.
The main thing you need for this is a home freeze dryer. There are also a few more things that you can get to make the drying process easier. These extra tools can help you store your food right when you finish.
Let's talk about the tools you must have and some that are good to have if you want to start using a freeze dryer.
Essential Equipment and Supplies
To freeze-dry strawberries at home, you need some main things. At the top of this list is a home freeze dryer. A lot of people choose the Harvest Right freeze dryer. This dryer comes in different sizes, so you can pick one that fits your family. If you can, it's a good idea to get a larger size. A big dryer can dry more strawberries at one time and is more efficient for each pound of food.
You will need some basic kitchen tools for this. A cutting board and a knife will help you slice what you want to use. The freeze dryer comes with freeze dryer trays. It is a good idea to use parchment paper or silicone liners on the trays. This will stop food from sticking and make the cleanup easier with your dryer.
Here is a list of essential supplies:
-
Home Freeze Dryer: A Harvest Right freeze dryer is one that many people pick.
-
Freeze Dryer Trays: The trays will come included with the dryer.
-
Parchment Paper or Silicone Liners: Put these on the trays so the food does not stick.
-
Cutting Board and Knife: Use these to slice everything the same way.
-
Kitchen Towels: Dry the strawberries well with these after washing.
-
Airtight Storage Containers: You can use mason jars if you want to store for a short time.
Optional Tools for Better Results
You do not have to have these extra tools when you start, but using them can really help your results. They can also make the shelf life of your freeze-dried foods longer. These are good to use if you want to keep your strawberries for a long time.
To keep your strawberries fresh in glass jars, it is good to use a jar sealer. A vacuum jar sealer takes out the air from the jar before you close it. This helps the strawberries stay fresh for a longer time. You can also seal the jars again after each time you open them to keep their crispness.
If you want to keep food for a long time, like for over a year, you should use mylar bags with oxygen absorbers. These tools are needed. They help make the right space for storing food. Mylar bags keep out moisture, light, and oxygen. This way, the food stays good for a longer time.
-
Vacuum Jar Sealer: You use this to take air out from mason jars.
-
Mylar Bags: Put your food in these for long-term storage. They help to block out light and moisture.
-
Oxygen Absorbers: Add these to remove the last bit of oxygen from your storage. This helps your food last for over 20 years and keeps the shelf life longer.
-
Labels and Marking Pen: Use these to write down dates and names so you know what is in each batch.
Where to Source Quality Strawberries in the United States
To get the best freeze-dried product, you need to find high-quality strawberries. In the United States, the berries that taste the best are usually local ones. You can get these at farmers' markets, farm stands, or you-pick farms close to you. The best time to find good strawberries is from spring to early summer.
When you buy local, you often get berries that are grown for their taste. These strawberries are not picked just to last through a long trip. They are usually more ripe and sweet, so your freeze-dried fruit will taste better. If you want to know more, feel free to ask the farmer how they grow their berries and which ones they think are best.
If you can't get strawberries from a local farm, you can look for organic strawberries at the store. These often taste better. Make sure you taste the berries before you start the drying process. A fresh strawberry that tastes good will make a better freeze-dried treat.
Step-by-Step Guide to Freeze Dry Strawberries at Home
Now that you have the strawberries and the equipment ready, you can start the fun part. The process of freeze drying is easy to do step by step. The freeze dryer will handle most of the work. Still, getting things ready and handling them the right way is very important for a good batch.
This guide gives you easy steps to follow for making freeze-dried strawberries. It covers everything, from getting the fruit ready, setting them in place, starting the machine, to checking if they are done. By following these steps, you will get tasty, crispy strawberries with little effort.
Step 1: Prepping Your Strawberries
The first step is to get your strawberries ready. This is one of the most important things you need to do for the drying process. Getting this right will help the strawberries dry faster and more evenly. It will also help you get a better final result. First, wash the strawberries gently in cool water. This will take off any dirt.
After you wash the berries, it is important to get them dry. You can use kitchen towels to pat the berries dry or put them on a rack to let them air dry. If there is still water on the berries, the freeze dryer will take more time to dry them completely. So, make sure you take off as much moisture as you can before using the dryer.
Once the strawberries are all clean and dry, take off the green tops. Then, slice the strawberries. It is important to keep every slice the same size.
-
Wash the strawberries well but do it in a gentle way.
-
Dry all the berries fully. This helps to cut down the drying time.
-
You have to hull the strawberries by taking off the green tops.
-
Slice them into the same size. Go for pieces that are about ¼-inch thick for best results.
Step 2: Arranging Strawberries on Trays
How you put the strawberries on the freeze dryer trays is important. To get the best results, use parchment paper or silicone mats on your trays. This easy step stops the fruit from sticking to the metal trays of your dryer. It also makes it much easier to take the strawberries out and clean up.
Next, put the strawberry slices on the trays you set up. It is best to place them in a single layer. Make sure the slices do not be on top of each other. If you are drying a big batch, you can have some pieces overlap, but a single layer works the best. This way, air moves around each strawberry slice and helps them dry well.
If you want to make strawberry powder, you can spread strawberry puree on the trays. But keep in mind, slices of strawberry are more useful for different things.
-
Line the freeze dryer trays with parchment paper or silicone liners.
-
Place the strawberry slices in a single layer. Try not to let them touch or overlap.
-
Do not fill the trays higher than the rims. This will help them fit well in the freeze dryer.
Step 3: Operating Your Freeze Dryer or DIY Alternatives
Now that your trays are ready, you can start using your freeze dryer. For the best results, turn on the freeze dryer first. Let the dryer cool down for about 30 minutes before you put your trays in. This step helps speed up the first freezing part. If you want to make drying time even shorter, you can put your trays of strawberries in a freezer before using the freeze dryer. This will help cut down on the time the dryer needs.
When the freeze dryer is cold and ready, put the trays in with care. Close the door and make sure to lock the latch tight. If you are using a Harvest Right dryer, all you have to do now is press "Start" or "Continue." The machine will do the rest. It will handle freezing, the vacuum, and the drying on its own.
If you put in fruit that is at room temperature, you need to pick the "Not Frozen" choice. The machine will then do everything for you. The drying process is fully automatic.
-
Pre-cool your freeze dryer for at least 30 minutes.
-
Put the trays into the dryer and make sure to close the door well.
-
Press "Start" and let the freeze dryer do the rest on its own.
Step 4: Checking for Complete Drying and Cooling
After the freeze dryer says the batch is done, which is most times around 20 to 24 hours, you need to make sure the strawberries are dry. If there is still moisture in the fruit, it will not be good for long-term storage. Moisture content that stays in the strawberries can cause them to go bad. The freeze dryer works best when it removes all the moisture from the batch.
To see if the drying process is done, pick one of the thickest strawberry slices from the batch and break it in half. It should feel firm and snap when you break it. The inside should be dry, with no moisture or cold spots. If it still feels soft, chewy, or cold, the drying process is not done yet.
If you see that the strawberries are not finished, you can just add more drying time. Close the door and add a few more hours using the machine's interface. Keep going until they are nice and crisp.
-
When the cycle is over, test the thickest piece of strawberry to see if it is dry.
-
A strawberry that is dry will feel hard and break apart easily.
-
If it is not dry, let it go through the drying cycle again until the strawberries are done.
Storing and Using Freeze Dried Strawberries
Once your strawberries are freeze-dried and ready, the last step is to store them the right way. This helps keep them crisp and tasty for a long time. Freeze-dried food can take in moisture from the air. So, you need to put it in airtight containers right away.
The way you keep your berries has a big impact on how long they last. You can put snacks in Mason jars, or keep your berries as long-term supplies in mylar bags. Both options help keep your berries fresh for longer and are great for the shelf life of your food.
After you store your homemade freeze-dried strawberries, there are a lot of fun and tasty ways you can enjoy them. Here are tips to keep them fresh as well as some good ideas for what to do with your harvest.
How to Store Freeze Dried Strawberries for Maximum Freshness
Storing your freeze-dried strawberries the right way helps keep their quality and shelf life. Once they are done and have cooled down, you should put them into airtight containers right away. The air and moisture can take away their freshness, so it is best to keep them out of reach.
For short-term storage that lasts up to a year, you can use glass jars such as Mason jars with lids that fit well. These work great to keep your strawberries fresh. To protect your strawberries even more, use a jar sealer to take out the air. This way is good if you want to use the strawberries for snacks and need to open the jar often.
For long-term storage of 20 years or even more, use mylar bags with an oxygen absorber. This is the best way to protect your things from moisture, direct sunlight, and oxygen. Mylar bags help keep out air and water, so your items stay safe and dry.
-
Put the dried strawberries in airtight containers right away.
-
Use mason jars if you want to store them for 1--2 years.
-
For long-term storage (more than 20 years), pack them in mylar bags with an oxygen absorber.
-
Keep all your containers in a place that is cool, dark, and dry.
Creative Ways to Use Freeze Dried Strawberries
One really good thing about freeze-dried strawberries is that you can use them in many ways. The easiest way to have them is as a healthy snack right out of the jar. They are crunchy and taste strong, so they are a good and tasty choice instead of chips or candy.
You can add them to many kinds of meals and recipes. Just crush them a little and put them in your cereal, oatmeal, or homemade granola. This will give your breakfast a fresh fruit taste. You will notice they are good for trail mix also. They give you energy without much weight when you go hiking or on camping trips.
You can soak the dried strawberry slices in water to use them in muffins or cobblers. You can also use a food processor or blender to make a fine strawberry powder. The strawberry powder is great to give flavor to frosting, smoothies, or even homemade ice cream.
-
Eat them as a crunchy and healthy snack.
-
Add the strawberry pieces to yogurt, granola, or your breakfast cereals.
-
Blend them into smoothies to get more strawberry flavor.
-
Grind them to a powder. You can use this powder for baking or to add more flavor.
-
Dip them in melted chocolate. This makes a sweet treat.
Are Freeze Dried Strawberries Good for Backpacking or Long-Term Storage?
Yes! Freeze-dried strawberries are a great pick for both backpacking and long-term storage. The drying process takes out almost all the water from them. This makes them very light to carry. That is good when you go backpacking, because every ounce in your bag counts. They give you a tasty, high-energy snack and do not feel heavy in your pack.
The biggest reason people choose freeze-dried strawberries for long-term storage is how long they last. If you keep them in mylar bags with oxygen absorbers, they can be good for 20 to 25 years or more. This long shelf life makes them a great choice for emergency preparedness. You can use them to get good fruit even when it is not the right time of year to buy fresh ones.
Their steady shelf life means you can make a food pantry you trust without needing power. It does not matter if you want to get ready for a big storm or just have summer berries when it's cold out. Freeze-dried strawberries are a good choice.
Troubleshooting and Common Mistakes to Avoid
While the drying process mostly works on its own, some things can still go wrong. This can happen a lot when you first get started. Most of the time, these problems have to do with food not getting all the way dry. A few small mistakes in how you get the food ready or how you run the machine can cause this.
If you know what signs to check for and how to stop these mistakes, you can make sure every batch turns out well. A wet center or a drying time that's too long are the common problems. Here, we will talk about the things that often go wrong and how you can stop them. This will help you get perfect freeze-dried strawberries every time.
Common Problems When Freeze Drying Strawberries at Home
One big problem that many people new to drying fruit face is that their fruit is not fully dry. If your strawberries feel soft, feel chewy, or feel cool in the middle, they still have moisture inside. This leftover moisture content can make them spoil when you store them. A common reason for this is if the pieces are too thick, or if the batch is crowded.
Another problem that comes up is if the drying time is too long. A batch may need more time in the dryer than the usual 20 to 24 hours. This can happen if there is too much water on the fruit before you put it in or if you load too much in the machine.
If you see condensation inside your storage jar, it means the strawberries were not dry enough. You need to take the fruit out right away and dry it one more time.
-
Soft or Chewy Centers: This means the fruit is not dry enough. You need to make the drying time longer.
-
Extended Drying Time: This can happen when the fruit is wet or if you put too much on the trays.
-
Condensation in Storage Jars: If you see moisture inside the jars, it means there is still water in the batch. You should put it back to dry more.
-
Fruit Sticking to Trays: You can stop this when you use parchment paper or silicone liners.
Mistakes Beginners Make and How to Prevent Them
New people who try freeze drying sometimes make mistakes that can be stopped easily. A big mistake is not cutting the strawberries into even slices. When slices are not all the same size, the drying process is not even. Thin pieces dry much faster than the thick ones. So, always try to cut the strawberries into even ¼-inch slices.
Another mistake is not drying the berries well after you wash them. If there is any extra moisture left, the drying time will be much longer. This is because the machine has to work harder to get rid of that water. Always make sure you pat your berries dry when you are done washing them.
Putting too much fruit on the trays is a mistake that many people make. It might feel good to fit a lot in, but having just one even layer works better. The fruit will dry faster and come out better this way.
When you are all done, put the fruit right into an airtight container. If you leave it out, it can take in moisture from the air. This will make the fruit lose its crisp feel.
-
Inconsistent Slicing: Cut all pieces so they have the same thickness.
-
Not Drying Fruit After Washing: Make sure you pat the berries fully dry.
-
Overloading Trays: Put the fruit in a single layer.
-
Delaying Storage: Pack the fruit right away in airtight containers after drying.
-
Not Checking for Doneness: Always break open the thickest piece to make sure it is dry inside.
Conclusion
To sum up, freeze drying strawberries at home can be a fun and useful way to keep the great taste and the health benefits of strawberries all year round. When you follow the steps in this guide, you get top-quality freeze-dried strawberries for snacks, baking, or for adding to your tasty dishes. Be sure to pick ripe strawberries and use the right tools for the job. Try out the different ways we shared and enjoy bringing freeze-dried strawberries into your meals and snacks. If you have any questions or need help, feel free to ask and start your freeze-drying journey today!
Frequently Asked Questions
Can I Freeze Dry Strawberries Without a Special Machine?
True freeze drying needs a special machine. This is because the process uses a deep vacuum to take out moisture as vapor. A regular freezer or dry ice does not make this vacuum. So, they are not true freeze drying. These ways do not remove as much moisture from food and do not give long-term shelf life.
How Long Does It Take to Freeze Dry Strawberries at Home?
A batch of sliced strawberries usually takes about 20 to 24 hours to freeze dry in a home freeze dryer. The drying time can change based on a few things. These things include how thick the slices are, if you froze the slices before, and how much you fill the trays in the dryer.
What's the Best Way to Tell If My Strawberries Are Completely Freeze Dried?
The easiest way to see if something is dry is to break one of the thickest pieces in half. It should feel hard and break with a snap. If you feel any moisture, softness, or cold in the center, leave it in the dryer for more time.
Are Freeze Dried Strawberries Healthy Compared to Other Preservation Methods?
Yes, freeze-dried strawberries are a healthy snack. The drying process keeps almost all of the nutrition, vitamins, and sweetness from the fresh fruit. There is no need to add sugar or keep it with preservatives. It is better than canning because canning can take away some nutrients by using heat.